
정리정돈 개발블로그~
[53일차] 국비교육 본문
<Math.random 예제>
<!DOCTYPE html>
<html lang="en">
<head>
    <meta charset="UTF-8">
    <meta http-equiv="X-UA-Compatible" content="IE=edge">
    <meta name="viewport" content="width=device-width, initial-scale=1.0">
    <title>Document</title>
    <style>
        h1{
            border: 1px solid black;
            padding : 10px;
            background: #eee;
        }
    </style>
</head>
<body>
    <h1>당첨자 발표</h1>
    <script src="./sample.js"></script>
</body>
</html>
let seed = prompt("전체 응모자 수 :", "");
let picked = Math.floor((Math.random() * seed) +1);

document.write("전체 응모자 수 :" + seed + "명");
document.write("<br>");
document.write("당첨자 : "+ picked + "번");
출력

<문서 객체 모델(DOM)>

- HTML 문법으로 작성한 태그, 주석, 텍스트와 같은 구성 요소들은 웹브라우저에서 각각 하나의 객체로 인식
- 문서 객체 모델(DOM) :HTML 구성 요소들을 다루는 객체
- document는 노드가 아니라 객체이므로 html이 루트 노드가 됨
let doc = document.firstChild;
console.log("doctype : "+doc);

let html = document.firstElementChild;
console.log("html : " + html);
출력

<HTMLCollection 객체>
<!DOCTYPE html>
<html lang="en">
<head>
    <meta charset="UTF-8">
    <meta http-equiv="X-UA-Compatible" content="IE=edge">
    <meta name="viewport" content="width=device-width, initial-scale=1.0">
    <title>요소 노드 선택하기</title>

</head>
<body>
    <h1 id="title">title</h1>
    <p class ="text">text-1</p>
    <p class ="text">text-2</p>
    <script src="./sample.js"></script>
</body>
</html>
// id 속성값이 title인 요소 노드 선택
const el = document.getElementById("title");
console.log(el);
// class 속성값이 text인 요소 노드 선택
const clsEl = document.getElementsByClassName("text");
console.log(clsEl[0]);

const tagEl = document.getElementsByTagName("p");
console.log(tagEl[1]);
출력

<!DOCTYPE html>
<html lang="en">
<head>
    <meta charset="UTF-8">
    <meta http-equiv="X-UA-Compatible" content="IE=edge">
    <meta name="viewport" content="width=device-width, initial-scale=1.0">
    <title>요소 노드 선택하기</title>

</head>
<body>
    <h1 id="title">title</h1>
    <p class ="text">text-1</p>
    <p class ="text"></p>
    <script src="./sample.js"></script>
</body>
</html>
// id 속성값이 title인 요소 노드 선택
const el = document.getElementById("title");
console.log(el);
// class 속성값이 text인 요소 노드 선택
const clsEl = document.getElementsByClassName("text");
console.log(clsEl[0]);
console.log(clsEl[1]);
// 위에 결과와 같다
for(let el of clsEl) console.log(el);

const tagEl = document.getElementsByTagName("p");
for(let el of tagEl) console.log(el);
출력

---> HTMLCollection 객체는 유사 배열이라서 배열의 인덱스로 요소 접근이 가능
<query 메서드>
<!DOCTYPE html>
<html lang="en">
<head>
    <meta charset="UTF-8">
    <meta http-equiv="X-UA-Compatible" content="IE=edge">
    <meta name="viewport" content="width=device-width, initial-scale=1.0">
    <title>요소 노드 선택하기</title>

</head>
<body>
    <div class="box-1">
        <p class="text">text-1</p>
        <p class="text">text-2</p>
    </div>
    <div class ="box-2">
        <p class="text">text-3</p>
        <p class="text">text-4</p>
    </div>
    <script src="./sample.js"></script>
</body>
</html>
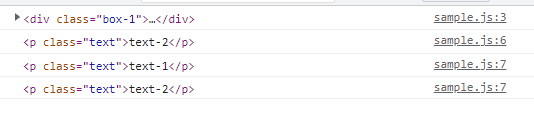
//CSS의 선택자 사용하기 - query 메서드
const el = document.querySelector(".box-1");
console.log(el);

const el_1 = document.querySelectorAll(".box-1 .text");
console.log(el_1[1]);
for(let el of el_1) console.log(el); // 모두 선택됨
출력
<노드 조작하기>
- textContent : 요소 노드의 모든 텍스트 접근
- innerText : 요소 노드의 텍스트 중 웹브라우저에 표시되는 텍스트 접근
- innerText : 요소 노드의 텍스트 중 HTML태그를 포함한 텍스트에만 접근
<!DOCTYPE html>
<html lang="en">
<head>
    <meta charset="UTF-8">
    <meta http-equiv="X-UA-Compatible" content="IE=edge">
    <meta name="viewport" content="width=device-width, initial-scale=1.0">
    <title>요소 노드 선택하기</title>

</head>
<body>
    <p id="title">Hello, <span style="display: none;"> JavaScript</span></p>
    <script src="./sample.js"></script>
</body>
</html>
// 노드 조작하기
let txtCon = document.getElementById("title").textContent; // 보이던 보이지 않던 모든 텍스트 접근
let inTxt = document.getElementById("title").innerText; // 웹 브라우저에 표시되는 텍스트 접근
let inHtml = document.getElementById("title").innerHTML; // HTML을 포함한 텍스트

console.log(txtCon);
console.log(inTxt);
console.log(inHtml);
출력

// 노드 조작하기 : 컨텐츠 조작하기
// innerHtml에만 태그와 넣어야 인식 됨
document.getElementById("title").innerHTML ="<h1>날씨가 좋아요</h1>";
<!DOCTYPE html>
<html lang="en">
<head>
    <meta charset="UTF-8">
    <meta http-equiv="X-UA-Compatible" content="IE=edge">
    <meta name="viewport" content="width=device-width, initial-scale=1.0">
    <title>요소 노드 선택하기</title>
    <style>
        #text{
            font-size: 2em;
        }
    </style>
</head>
<body>
    <p id="text"> 글자를 입력 합니다.</p>
    <script src="./sample.js"></script>
</body>
</html>
// 노드 조작하기 : 스타일 조작하기

// css 선택자를 js에서 선택 (<노드>.style.css속성명 = <속성값>)
const pEl =document.querySelector("#text");
pEl.style.backgroundColor = "#ff0000";
pEl.style.fontSize = "20px";
pEl.style.color = "#ffffff";
pE1.style.fontWeight= "bold";
<스타일 여러개 동시에 넣기>
<!DOCTYPE html>
<html lang="en">
<head>
    <meta charset="UTF-8">
    <meta http-equiv="X-UA-Compatible" content="IE=edge">
    <meta name="viewport" content="width=device-width, initial-scale=1.0">
    <title>요소 노드 선택하기</title>
    <style>
        .active{
            font-size: 20px;
            font-weight: bold;
            font-style: italic;
        }
        .red-color{
            color : red;
        }
        .orange-color{
            color : orange;
        }
    </style>
</head>
<body>
    <p id="text"> 글자를 입력 합니다.</p>
    <script src="./sample.js"></script>
</body>
</html>
// 노드 조작하기 : 스타일 조작하기

const elId = document.querySelector("#text");
elId.classList.add("active","red-color");
<!DOCTYPE html>
<html lang="en">
<head>
    <meta charset="UTF-8">
    <meta http-equiv="X-UA-Compatible" content="IE=edge">
    <meta name="viewport" content="width=device-width, initial-scale=1.0">
    <title>요소 노드 선택하기</title>
    <style>
        .active{
            font-size: 20px;
            font-weight: bold;
            font-style: italic;
        }
        .red-color{
            color : red;
        }
        .orange-color{
            color : orange;
        }
        .box{
            width: 300px;
            height: 150px;
            border: 1px solid green;
            display: flex;
            align-items: center;
            justify-content: center;
        }
    </style>
</head>
<body>
    <p id="text"> 글자를 입력 합니다.</p>
    <script src="./sample.js"></script>
</body>
</html>
const elId = document.querySelector("#text");
elId.classList.add("active","red-color","box");
<메서드 속성 조작하기>
<!DOCTYPE html>
<html lang="en">
<head>
    <meta charset="UTF-8">
    <meta http-equiv="X-UA-Compatible" content="IE=edge">
    <meta name="viewport" content="width=device-width, initial-scale=1.0">
    <title>요소 노드 선택하기</title>
    <style>

    </style>
</head>
<body>
    <a href="http://google.co.kr">구글</a>
    <script src="./sample.js"></script>
</body>
</html>
// 메서드 속성으로 조작 하기

const aEl = document.querySelector("a");
// 태그 속성 중 href을 가져옴 -> 구글 주소
const href = aEl.getAttribute("href");
console.log(href);
aEl.setAttribute("href","http://kakao.com");
// innerText : 웹브라우저에 표시되는 텍스트 접근
aEl.innerText="카카오";
<노드 추가, 삭제하기>
<!DOCTYPE html>
<html lang="en">
<head>
    <meta charset="UTF-8">
    <meta http-equiv="X-UA-Compatible" content="IE=edge">
    <meta name="viewport" content="width=device-width, initial-scale=1.0">
    <title>요소 노드 선택하기</title>
    <style>
    </style>
</head>
<body>
    <script>
        // a태그 만듦
        const aEl = document.createElement("a");
        document.body.appendChild(aEl);
        // 이름을 넣음
        const test = document.querySelector("a");
        test.innerHTML = "테스트";
        // 링크를 이어줌
        test.setAttribute("href", "http://naver.com");
        // 제거
        // document.body.appendChild(aEl); 와 유사
        document.body.removeChild(aEl);
    </script>
</body>
</html>
<폼 조작하기>
[폼 요소의 입력값 다루기]
- 폼 요소의 입력값 다루기 : 사용자에게 값을 입력받아 서버에 전달, 전달받은 값을 서버에서 어떻게 활용해야하는지 백엔드 영역이지만, 서버에 전달하기까지 폼 요소에 입력된 값이 유효한지 검증가능
<!DOCTYPE html>
<html lang="en">
<head>
    <meta charset="UTF-8">
    <meta http-equiv="X-UA-Compatible" content="IE=edge">
    <meta name="viewport" content="width=device-width, initial-scale=1.0">
    <title>form 태그 선택하기</title>
    <style>
    </style>
</head>
<body>
    <form name="frm">
        <label>아이디
            <input type="text" name="id">
        </label>
        <br>
        <label>패스워드
            <input type="password" name="pw">
        </label>
        <br>
        <br>
        <textarea name="desc" id="" cols="30" rows="10"></textarea>
    </form>
    <script>
        document.frm.id.value = "사자라이언";
        document.frm.pw.value = "eori1236";
        document.frm.desc.value = "안녕하세요. 맑고 화창한 가을 입니다. 그래도 가을은 별로 입니다.";
    </script>
</body>
</html>
<!DOCTYPE html>
<html lang="en">
<head>
    <meta charset="UTF-8">
    <meta http-equiv="X-UA-Compatible" content="IE=edge">
    <meta name="viewport" content="width=device-width, initial-scale=1.0">
    <title>form 태그 선택하기</title>
    <style>
    </style>
</head>
<body>
    <form name="frm">
        <label><input type="checkbox" value="apple">사과</label>
        <label><input type="checkbox" value="banana">바나나</label>
        <label><input type="checkbox" value="orange">오렌지</label>
        <label><input type="checkbox" value="melon">멜론</label>
    </form>
    <script>
        // querSelectorAll 유사배열로 넘어옴
       const checkEls = document.querySelectorAll("[type = 'checkbox']");
       for(let i = 0; i < checkEls.length; i++){
            if(i%2 ==0) checkEls[i].checked = true;
       }
    </script>
</body>
</html>
<!DOCTYPE html>
<html lang="en">
<head>
    <meta charset="UTF-8">
    <meta http-equiv="X-UA-Compatible" content="IE=edge">
    <meta name="viewport" content="width=device-width, initial-scale=1.0">
    <title>form 태그 선택하기</title>
    <style>
    </style>
</head>
<body>
    <form name="frm">
        <label><input type="radio" value="apple">사과</label>
        <label><input type="radio" value="banana">바나나</label>
        <label><input type="radio" value="orange">오렌지</label>
        <label><input type="radio" value="melon">멜론</label>
    </form>
    <script>
        // querSelectorAll 유사배열로 넘어옴
        const radioEls = document.querySelectorAll("[type = 'radio']");
        for(let i = 0; i < radioEls.length; i++){
            if(radioEls[i].value === "banana"){
                radioEls[i].checked = true;
            }
        }
    </script>
</body>
</html>
<!DOCTYPE html>
<html lang="en">
<head>
    <meta charset="UTF-8">
    <meta http-equiv="X-UA-Compatible" content="IE=edge">
    <meta name="viewport" content="width=device-width, initial-scale=1.0">
    <title>form 태그 선택하기</title>
    <style>
    </style>
</head>
<body>
    <form name="frm">
        <select name="opt">
            <option value="choose">선택하세요</option>
            <option value="bar">===========</option>
            <option value="apple">사과</option>
            <option value="banana">바나나</option>
            <option value="orange">오렌지</option>
            <option value="melon">멜론</option>
        </select>
    </form>
    <script>
        const selEls = document.querySelectorAll("option");
        for(let i = 0; i < selEls.length; i++){
            if(selEls[i].value == "choose"){
                selEls[i].selected = true;
            }
        }

    </script>
</body>
</html>
<DOM 예제 - 입력한 항목 클릭하여 삭제하기>
<!DOCTYPE html>
<html lang="en">
<head>
    <meta charset="UTF-8">
    <title>DOM 추가 삭제</title>
    <link rel="stylesheet" href="style.css">
</head>
<body>
    <div id = "container">
        <h1>DOM 추가/삭제</h1>
        <p>공부할 과목을 입력 하세요.</p>
        <p>공부가 끝난 과목은 클릭해서 삭제할 수 있습니다.</p>
        <form action="">
            <!-- autofocus : 커서를 누르지 않아도 커서가 가있음 -->
            <input type="text" id="subject" autofocus>
            <!-- return false : 기본 기능인 submit 이벤트를 취소하고
                newRegister()을 사용하겠다는 것 -->
            <button onclick="newRegister(); return false">추가</button>
        </form>
        <!-- hr : 줄바꿈 -->
        <hr>
        <ul id ="itemList"></ul>

    </div>
    <script src = "./dom.js"></script>
</body>
</html>
* {
/* 패딩과 border라인두께까지를 기본 두께로 하겠다(마진 제외) */
box-sizing: border-box;
}
#container{
width: 500px;
margin : 20px auto;
padding : 20px;
}
input[type="text"]{
width: 370px;
/* float : 신문 기사 같이 사진 주변에 자연스럽게 글자 흐름 */
float: left;
height: 30px;
padding-left: 30px;
}
button{
width: 90px;
height: 30px;
float: right;
background-color: #222;
color: white;
border: none;
}
hr{
clear: both;
display: none;
}
ul{
list-style: none;
padding-top: 50px;
}
li{
/* 글자 간격에 1.2배 */
line-height: 1.2;
}function newRegister(){
let newItem = document.createElement("li"); // 요소 노드 추가
let subject = document.querySelector("#subject"); // 폼의 텍스트 필드
let newText = document.createTextNode(subject.value); // 텍스트 필드의 값으로 텍스트 노드만들기
// li태그를 추가
newItem.appendChild(newText);
let itemList = document.querySelector("#itemList");
// itemList.insertBefore : itemList에 맨 앞에 삽입
itemList.insertBefore(newItem, itemList.childNodes[0]);
subject.value ="";
let items = document.querySelectorAll("li");
for(i = 0; i < items.length;i++){
// addEventListener : 감시자 역할
items[i].addEventListener("click", function() {
if(this.parentNode) {// 부모 노드가 있다면
this.parentNode.removeChild(this);
}
});
}
}
<이벤트 다루기>
- 이벤트 : 웹 브라우저와 사용자 사이에 상호작용이 발생하는 특정 시점을 의미
- 이벤트가 발생하면 이벤트 종류에 따라 어떤 작업을 하거나 미리 등록한 함수를 호출하는 등의 조작을 자바스크립트로 지정
- 마우스 이벤트 : onclick - 마우스를 클릭하면 발생 -> 주로 사용
- 이벤트 등록하기 : 이벤트가 발생할때 어떤 작업을 할지 자바스크립트 코드로 작성하는 것
- 이벤트를 등록하는 방법은 크게 3가지(인라인, 프로퍼티 리스너, 이벤트 등록 메서드)
<!DOCTYPE html>
<html lang="en">
<head>
    <title>이벤트</title>
</head>
<body>
    <button onclick="clickEvent(100)">클릭</button>
    <script>
        function clickEvent(num){
            alert("cilck !!!!" + num);
        }
    </script>
</body>
</html>
*인라인
<!DOCTYPE html>
<html lang="en">
<head>
    <title>이벤트</title>
</head>
<body>
    <!-- blur : 흐리게 함 -->
    <input id = "input_box" type="text" onfocus="focusEvent()" onblur="blurEvent()">
    <script>
        // 요소에 포커스가 되면 발생
        function focusEvent() {
            let inputBox = document.querySelector("#input_box");
            inputBox.style.background = "orange";
        }
        // 요소가 포커스를 잃으면 발생
        function blurEvent() {
            let inputBox = document.querySelector("#input_box");
            inputBox.style.background = "green";
        }
    </script>
</body>
</html>
*프로퍼티 리스너
<!DOCTYPE html>
<html lang="en">
<head>
    <title>이벤트</title>
</head>
<body>
    <button>클릭</button>
    <script>
        const btnEl = document.querySelector("button");
        // ()매개변수 자리
        btnEl.onclick =() => alert("화살표 함수로 구현");

    </script>
</body>
</html>
*이벤트 등록 메서드
<!DOCTYPE html>
<html lang="en">
<head>
    <title>이벤트</title>
</head>
<body>
    <button>클릭</button>
    <script>
        const btnEl = document.querySelector("button");
        //프로퍼티 리스너 : btnEl.onclick = () => {}
        // function: 무명 함수 => 일회용 함수이므로 가능
        btnEl.addEventListener("click", function(){
            alert("버튼이 눌렀습니다.");
        });
    </script>
</body>
</html>
<!DOCTYPE html>
<html lang="en">
<head>
    <title>이벤트</title>
</head>
<body>
    <button>클릭</button>
    <script>
        const btnEl = document.querySelector("button");
        //2번째방식 화살표함수
        btnEl.onclick =() => alert("button Click");

        //3번째방식 화살표함수
        // const clickEvent =() => alert("화살표 함수 ");
        // btnEl.addEventListener("click", clickEvent);
    </script>
</body>
</html>
<!DOCTYPE html>
<html lang="en">
<head>
    <meta charset="UTF-8">
    <title>버튼을 누르면?</title>
    <style>
        #green{
            border: none;
            background-color: green;
            color : white;
            width: 200px;
            height: 50px;
        }
        #orange{
            border: none;
            background-color: orange;
            color : white;
            width: 200px;
            height: 50px;
        }
        #purple{
            border: none;
            background-color: purple;
            color : white;
            width: 200px;
            height: 50px;
        }

        #green:hover{
            background-color: yellowgreen;
        }
        #orange:hover{
            background-color: lightcoral;
        }
        #purple:hover{
            background-color: lightpink;
        }

    </style>
</head>
<body>
    <button id="green">Green</button>
    <button id="orange">Orange</button>
    <button id="purple">Purple</button>

    <script>
        const btnEl = document.querySelector("#green");
        btnEl.onclick =() => alert("green click!!!");

        const btnEl2= document.querySelector("#orange");
        btnEl2.onclick = () => alert("orange click!!");

        const btnEl3 = document.querySelector("#purple");
        btnEl3.onclick = () => alert("purple click!!");

    </script>
</body>
</html>
<!DOCTYPE html>
<html lang="en">
<head>
    <meta charset="UTF-8">
    <title>배경색 바꾸기</title>
    <style>
           #green{
            border: none;
            background-color: green;
            color : white;
            width: 200px;
            height: 50px;
        }
        #orange{
            border: none;
            background-color: orange;
            color : white;
            width: 200px;
            height: 50px;
        }
        #purple{
            border: none;
            background-color: purple;
            color : white;
            width: 200px;
            height: 50px;
        }
        #box{
            width: 600px;
            height: 300px;
            border: 1px solid #ccc;
            background-color: lightblue;
            margin-top: 20px;
            border-radius: 10px;
        }

        #green:hover{
            background-color: yellowgreen;
        }
        #orange:hover{
            background-color: lightcoral;
        }
        #purple:hover{
            background-color: lightpink;
        }

    </style>
</head>
<body>
    <button id = "green">Green</button>
    <button id = "orange">Orange</button>
    <button id = "purple">purple</button>
    <div id ="box"></div>

    <script>
        // 스타일 조작 : <노드>.style.<css속성명> = <속성값>;
        const btnEl = document.querySelector("#green");
        btnEl.addEventListener("click", function(){
            box.style.background = "green";
        });

        const btnEl2 = document.querySelector("#orange");
        btnEl2.addEventListener("click", function(){
            box.style.background = "orange";
        });

        const btnEl3= document.querySelector("#purple");
        btnEl3.addEventListener("click", function(){
            box.style.background = "purple";
        });
    </script>
</body>
</html>
<!DOCTYPE html>
<html lang="en">
<head>
    <meta charset="UTF-8">
    <title>ITZY</title>
    <style>
    #item {
        position:relative;
        /* 자식 요소에 absolute가 있음 (relative위치에서 움직임) */
        width:500px;
        height:auto;
        padding:15px 20px;
        margin:auto;
    }
    button {
        background-color:rgba(255,255,255,0.7);
        padding:5px;
        border:1px solid #ccc;
        font-size:0.8em;
    }
    .over {
        position:absolute;
        right:130px;
        bottom:30px;
    }
    .detail {
        width:400px;
        text-align: left;
        line-height:1.8;
        display:none;
    }
    </style>
</head>
<body>
    <div id = "item">
        <img src="./itzy.jpeg" width="400" alt="ITZY">
        <button class="over" id="open" onclick="showDetail()"> 상세 설명 보기</button>
        <div id ="desc" class="detail">
            <h4>그룹 잇지</h4>
            <p>팀명 'ITZY'는 '너희가 원하는 거 전부 있지? 있지!'
                라는 뜻을 가지고 있으며, 정식 한글 표기법은 있지이다.
                혹 영어명인 'ITZY'로만 들어본 사람들이 한글로는 어떻게
                적는지 몰라 '잇지'라고 부르는 경우도 꽤 많이 있는데, '있지'라고
                불러야 한다며 정정해주는 것이 팬덤 잇지에게는 일상이 되었다.</p>
            <button id = "close" onclick="hideDetail()">상세 설명 닫기</button>
        </div>
    </div>
    <script>
        function showDetail() {
        document.querySelector('#desc').style.display = "block";
        // 상세 설명 부분을 화면에 표시
        document.querySelector('#open').style.display = "none";
        //'상세 설명 보기' 단추를 화면에서 감춤
        }

        function hideDetail() {
        document.querySelector('#desc').style.display = "none";
        // 상세 설명 부분을 화면에서 감춤
        document.querySelector('#open').style.display = "block";
        // '상세 설명 보기' 단추를 화면에 표시
        }
    </script>
</body>
</html>
'국비학원 교육 일지' 카테고리의 다른 글
| [55일차] 국비 교육 (0) | 2022.10.07 |
|---|---|
| [54일차] 국비 교육 (1) | 2022.10.06 |
| [52일차] 국비 교육 (1) | 2022.10.04 |
| [51일차] 국비교육 - 함수 (1) | 2022.09.30 |
| [50일차] 국비 교육 (1) | 2022.09.29 |
'국비학원 교육 일지' Related Articles
more
